Via Purifico Walkthrough
Via purifico walkthrough - Bevelles Cloister of Trials functions using a moving platform along a track. Read on for more information about the enemy including its stats obtainable items equipment drops and where to find it. We start off on land controlling Yuna and use ou. You can only use Wakka and the other Auroch players in any Blitzball match excluding the mandatory match. They are imprisoned to the Via Purifico where they are split into two sections. With the release of various mods the last few years an even better looking. Seek a room with a glyph press the glyph to get another of those teleporting things on the floor it will be in front of the gate. Theres Yuna Kimahri Lulu and Auron in the dry section and Tidus Wakka and Rikku in the underwater section. All side quests covered from the Monster Arena to Celestial Weapons. Tips for Gil and AP grinding and much more.
Final Fantasy X Walkthrough Via Purifico Jegged Com
Noting a 10000-Gil chest you can find whilst controlling Yuna in the Via Purifico. They are imprisoned to the Via Purifico where they are split into two sections. Check out the walkthrough and strategy guide section for additional details.
Show Image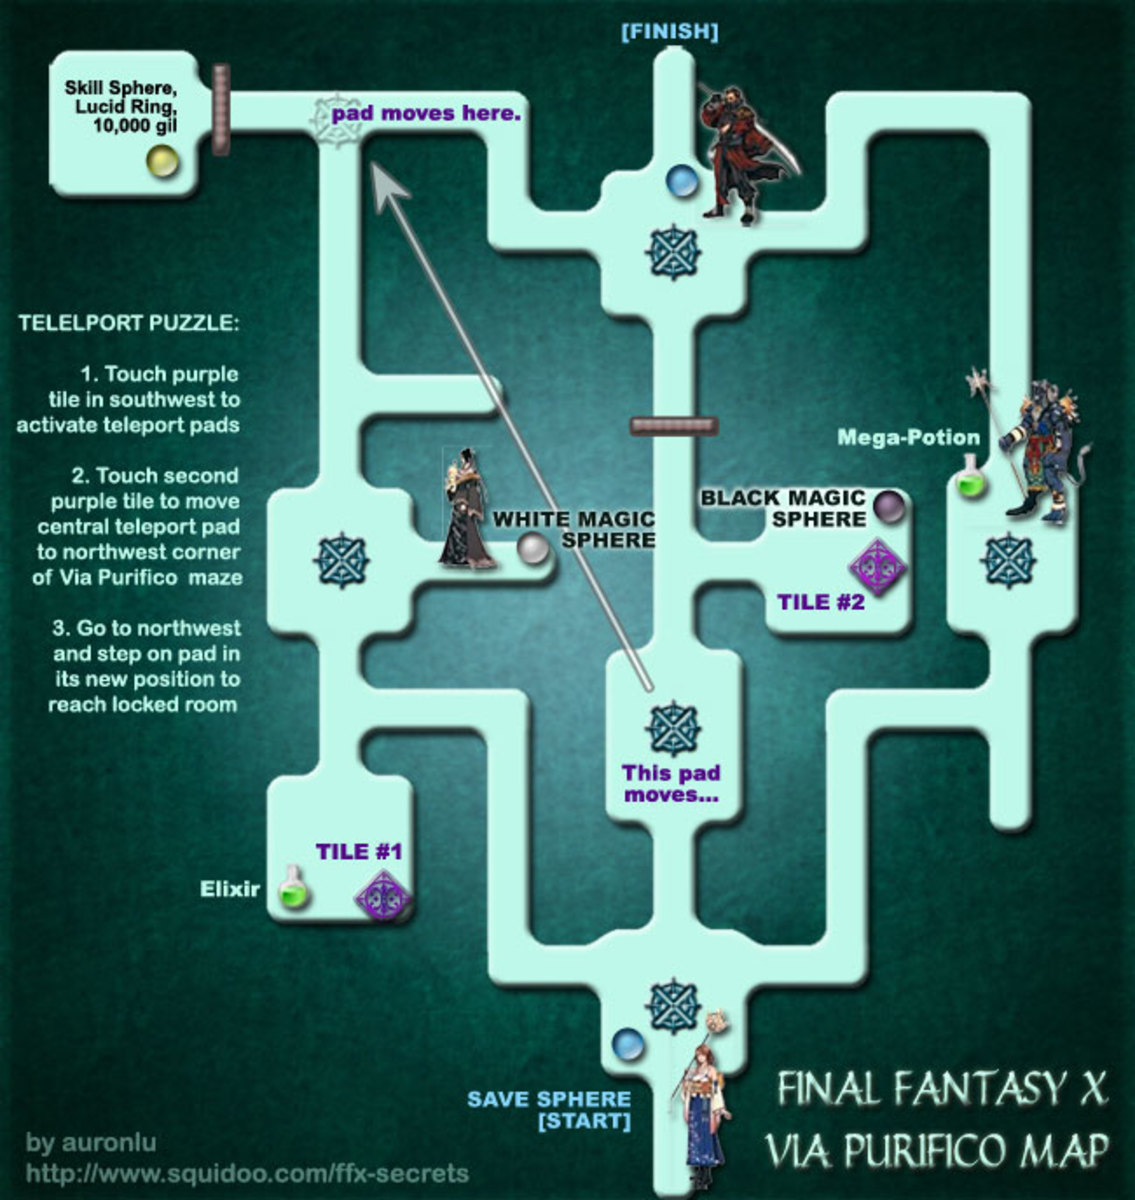
Final Fantasy X Secret Locations Airship Coordinates Levelskip
Swim ahead to find a Save Sphere do the obvious. Blitzball tips so you can laugh in the face of the Goers as you beat them 30-0 repeatedly. Bevelles Cloister of Trials functions using a moving platform along a track.
Show Image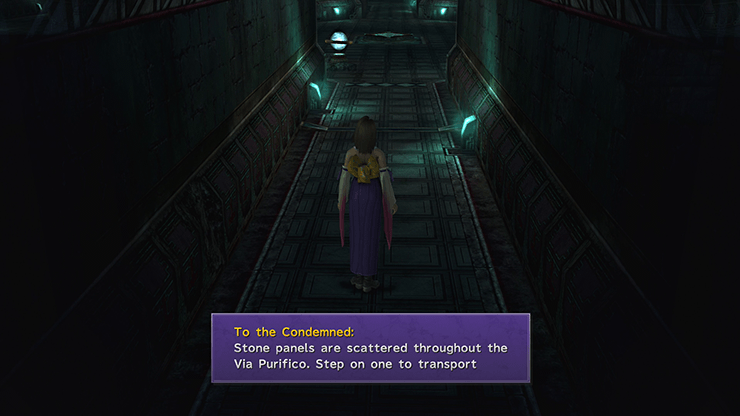
Final Fantasy X Walkthrough Via Purifico Jegged Com
You can only use Wakka and the other Auroch players in any Blitzball match excluding the mandatory match. Located in the Locked room to the North East in Via Purifico. Swim ahead to find a Save Sphere do the obvious.
Show Image
Ff10 Walkthrough Gamefaqs
All side quests covered from the Monster Arena to Celestial Weapons. Run down the slope and push the pedestal to begin. 3 ESG - Expert Sphere Grid.
Show Image
Walkthrough Part 21 Via Purifico Samurai Gamers
The platform is only available when the pedestal has a Bevelle Sphere so simply taking the one on the pedestal to use elsewhere wont work but there are two slots so you can use the pedestal to store a second Sphere while you carry a third. Seek a room with a glyph press the glyph to get another of those teleporting things on the floor it will be in front of the gate. Follow the railway until you reach the second to last 3 of 4 alternating glyph again.
Show Image
Ffx Walkthrough Part 42 Via Purifico Youtube
Bevelles Cloister of Trials functions using a moving platform along a track. Next we see Yuna in the Via Purifico and again I say we use a diagram again. Swim ahead to find a Save Sphere do the obvious.
Show Image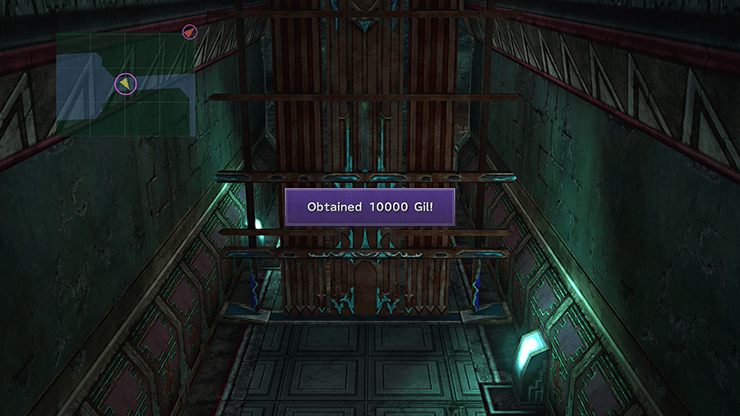
Final Fantasy X Walkthrough Via Purifico Jegged Com
You can only use Wakka and the other Auroch players in any Blitzball match excluding the mandatory match. All side quests covered from the Monster Arena to Celestial Weapons. Black Friday Deals.
Show Image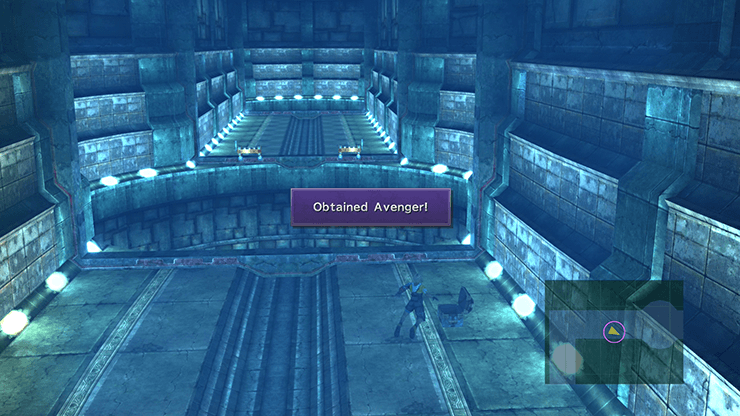
Final Fantasy X Walkthrough Via Purifico Jegged Com
Read on for more information about the enemy including its stats obtainable items equipment drops and where to find it. All optional bosses like Dark Aeons and Omega Weapon. A comprehensive Walkthrough from start to finish.
Show Image
Via Purifico Yuna Bevelle Walkthrough Final Fantasy X Hd Remaster Gamer Guides
Noting that I should be more specific in the location for Lulus Tough Bangle in Mushroom Rock. Via Purifico MapChat. This is Via Purifico Bevelles supposedly inescapable dungeon which the party has found themselves in.
Show Image
Final Fantasy X Remaster Walkthrough Part 38 Via Purifico Youtube
They are imprisoned to the Via Purifico where they are split into two sections. Black Friday Deals. 3 ESG - Expert Sphere Grid.
Show ImageA complete walkthrough for Return to Malacania Woods in Final Fantasy X FFX including enemies encountered obtainable items and boss strategy guides. Via purifico You cant open the gate. This is Via Purifico Bevelles supposedly inescapable dungeon which the party has found themselves in. Final Fantasy X Remaster Walkthrough Part 38 Via Purifico. Blitzball tips so you can laugh in the face of the Goers as you beat them 30-0 repeatedly. Via Purifico Walkthrough Calm Lands Walkthrough. Okay Im currently working towards capturing at least one of every fiend in Spira but in order to do that I need to return to Via Purifico. We start off on land controlling Yuna and use ou. Check out the walkthrough and strategy guide section for additional details. Part 30 of my Final Fantasy X Project.
Run down the slope and push the pedestal to begin. The platform is only available when the pedestal has a Bevelle Sphere so simply taking the one on the pedestal to use elsewhere wont work but there are two slots so you can use the pedestal to store a second Sphere while you carry a third. Noting that I missed a Phoenix Down in the checklist for the initial arrival on Besaid. All optional bosses like Dark Aeons and Omega Weapon. The trial reveals the higher echelons of the Yevon order to be engaged in a deception of their subordinates and the people of SpiraYuna and her guardians are found guilty of treason for killing Maester Seymour and conspiring with the Al Bhed to cause an insurrection. Use Bahamuts Impulse on hard enemies. Probably as fair as scoring a touchdown by punting the football at the 2 yard line when it is 1st and 10 98 for a goal. Tidus is sent to Via Purifico. Can only be obtained if Special. Initially released in 2001 FFX and FFX-2 received an HD Remaster in 2013.
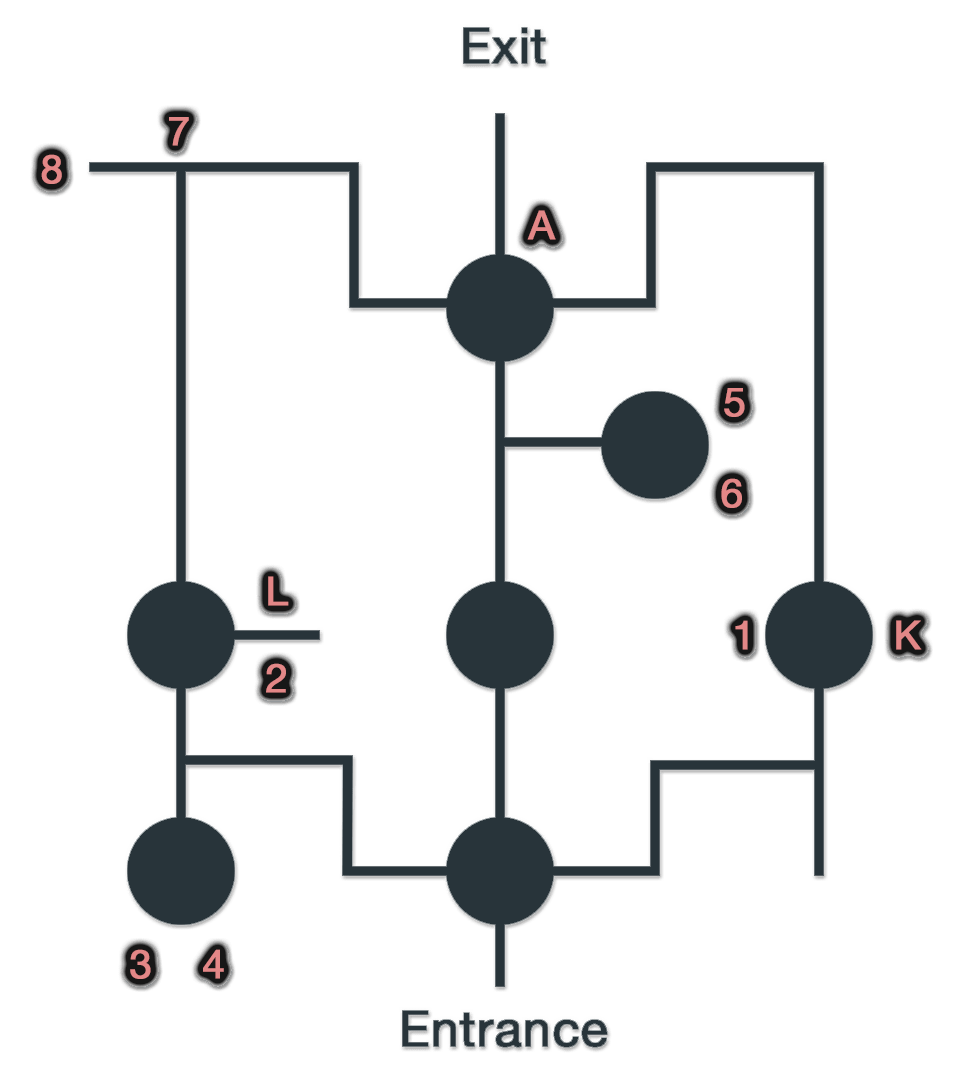
Read on for more information about the enemy including its stats obtainable items equipment drops and where to find it. Have Wakka deal with the Sahagins Rikku should Steal on every turn and have. Its a simple L-shaped bend youve got to navigate and as far as my game was concerned only one enemy formation may potentially cause you grief. 3 ESG - Expert Sphere Grid. A complete walkthrough for Via Purifico in Final Fantasy X FFX including enemies encountered obtainable items and boss strategy guides. Remove the glyph sphere from the pedestal and place it in the purple recess in the back. The next two sub-sections will define the areas of the Sphere Grid that belongs to Wakka. Take the sphere and place it on the pedestal then push the pedestal back onto the path. Tips for Gil and AP grinding and much more. Can only be accessed by using the teleportation platform.
A comprehensive Walkthrough from start to finish. Follow the railway until you reach the second to last 3 of 4 alternating glyph again. All side quests covered from the Monster Arena to Celestial Weapons. You can not use Tidus on your team as Wakka replaces him. Mass Effect Complete Walkthrough Tips Romance Guides and More. This is a lets play walkthrough with commentary for the remastered HD version of Final Fantasy X edition in HD for the PS3. Seek a room with a glyph press the glyph to get another of those teleporting things on the floor it will be in front of the gate. Bevelles Cloister of Trials functions using a moving platform along a track. Noting that I should be more specific in the location for Lulus Tough Bangle in Mushroom Rock. All optional bosses like Dark Aeons and Omega Weapon.
The Via Purifico is made up of two sections - the prison section that Yuna Kimahri Auron and Lulu explore and the underwater section which Tidus Wakka and Rikku explore. Jan 25 08 at 122am PST. Located in the Locked room to the North East in Via Purifico. A comprehensive Walkthrough from start to finish. Swim ahead to find a Save Sphere do the obvious. With the release of various mods the last few years an even better looking. 2 WakkaAurochs Only Blitzball. Noting a 10000-Gil chest you can find whilst controlling Yuna in the Via Purifico. This will open the path to a Destruction Sphere. Read on for more information about objectives item list and bosses within this section.